This is a guide to using the Pen tool in Illustrator. It was orginally posted on VectorTuts.
1. Functions
- Pen tool : Click on artboard to create paths with straight segments, click and drag to create paths with Bezier curves.

- Add anchor point tool : Click on a path segment to add anchor points.

- Delete anchor point tool : Click on anchor point to remove from path.

- Convert anchor point : Click on an anchor point and drag to create bezier handles where there were none, click on an anchor point with handles to a remove them.

- Scissors : Not part of the Pen tool group, but definitely associated with it. Click on a path segment to divide into two paths.

2. Keyboard Shortcuts
- Select Pen tool (P)
- Select Add anchor point tool (+)
- Select Delete anchor point tool (-)
- Select Convert anchor point tool (Shift + C)
- Select Scissors tool (C)
3. The Cursors
The pen tool takes on different forms depending on what you’re doing when you’re using it. Each one intuitively makes you aware of the action you are about to perform.
(Caps Lock to toggle between pointer and cross hair)

 Prepared to begin path
 Whilst midway through creating or editing a path
 When mouse is pressed
 When hovered over path section; to add an anchor point to path
 When hovered over anchor point; to remove anchor point from path
 When hovered over begin point of path; to close path
 When hovered over endpoint of existing path; to continue path
 When hovered over existing anchor point
4. Secondary Mouse Controls (with path selected)
- Pen tool hover over anchor point : changes to Delete anchor point tool
- Pen tool hover over path segment : changes to Add anchor point tool
- Pen tool hover over end anchor point : changes to Convert anchor point tool
Skellie / aetuts_skellie_2123
5. Keyboard Controls
- Hold Shift to constrain movements to 45°, 90°, 135° or 180° whilst creating or editing anchor points and handles.
- Select anchor point with Direct selection tool and click Delete. Anchor and adjoining path segments are deleted leaving two paths.
- Pen tool + Option (Alt) : changes to Convert anchor point tool.
- Pen tool hover over bezier handle + Command (Ctrl) : allows editing of bezier curve.
- Pen tool + Option (Alt) whilst creating bezier curve : splits curve (unhinges handles).
- Pen tool hover over bezier handle + Option (Alt) : splits curve (unhinges handles).
- Scissors tool + Option (Alt) : changes to Add anchor point tool.
- Add anchor point tool + Option (Alt) : changes to Delete anchor point tool.
- Delete anchor point tool + Option (Alt) : changes to Add anchor point tool.
6. Preferences
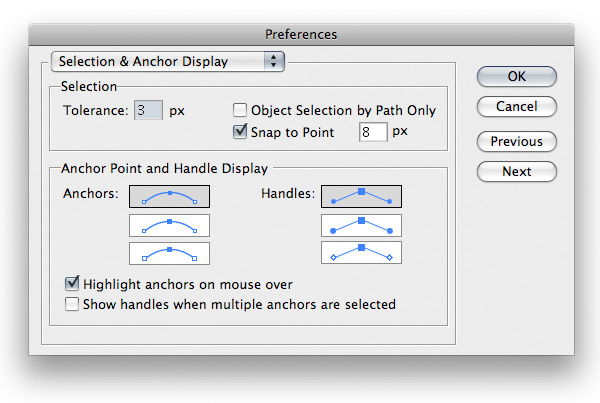
(Illustrator > Preferences > Selection & anchor display)

- Tolerance: Radius of the selection area around anchor points. Must be between 1 and 8 pixels, 1px if you’re deadly accurate with your mouse or have a lot of anchors in close range of one another, 8px if you prefer less precision. 3px is the default value.

- Object Selection by Path Only : When checked, this option allows selection of objects only by clicking their paths. Clicking on their filled areas is ineffective, comparable to working in Outline mode (View > Outline).

- Snap to Point: Also checkable via View > Snap to Point, though via the Selection & Anchor Display dialogue the tolerance can also be determined from 1 to 8 pixels. This value again represents the radius around anchor points. When lining up two objects, anchor points from one will snap to points of the other should they be positioned within the specified range.

- Anchor Point and Handle Display: Determines the way in which your path anchor points and handles are displayed.

- Highlight Anchors on Mouseover: When checked, highlights anchor points when hovered over with cursor.

- Show Handles When Multiple Anchors are Selected: When checked, this options displays the handles of points when multiple points are selected. Otherwise, handles of multiple selected points are notdisplayed.

7. Other Shortcuts and Tips
- Select the Direct Selection tool before selecting the Pen tool. Press and hold Command (Ctrl) to give you access to the last tool selected (in this case the Direct Selection tool) for editing of paths and handles without deselecting the path.
- With path selected, use the Spacebar to give you access to the Hand tool. Move your screen without deselecting the path or changing tools.
- While creating or editing an anchor point, click and hold mouse + Spacebar to alter the position of the anchor point you’re working on.

- With Direct Selection tool select endpoint and starting point of path. Command (Ctrl) + J to Join.
- With Direct Selection tool select endpoint and starting point of path. Command (Ctrl) + Option (Alt) + Shift + J to join and average simultaneously.
- To smoothen a path by reducing the number of anchor points open the Simplify dialogue (Object > Path > Simplify) and adjust according to your needs.

- Conversely, should you want more anchor points to improve manipulation go to Object > Path > Add Anchor Points. A new anchor point will appear after every existing anchor point on the selected path.
- To prevent the Pen tool from changing it’s function when interacting with other anchor points or paths, open the general preferences dialogue (Illustrator > Preferences > General) and check the Disable Auto Add/Delete option. The Pen tool will now only draw paths.

8. Best Practice Suggestions
- Drag handles from the first anchor point when beginning a curved path.
- Drag your handles around just one third of the curve you’re creating for a smooth path.

- Position anchor points on a curve where the paths begin to change direction, not in the middle of it’s curve.

- Be sparing with your use of anchor points, fewer points = neater path.
9. The Pen Tool Exercise
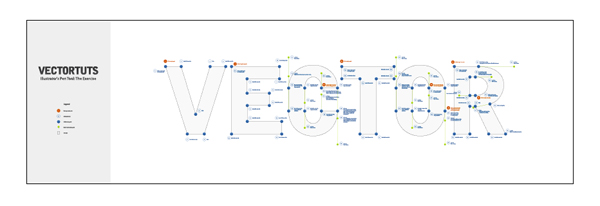
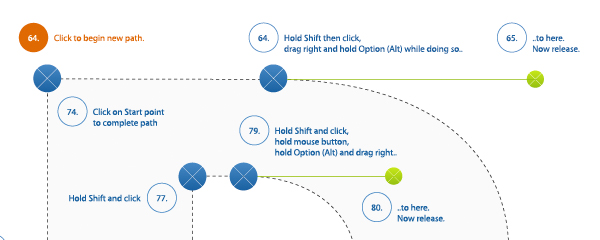
This is all well and good in theory, but while these tips are fresh in your mind why not put them into practice? Download the Pen Tool Exercise file and follow the guides to create precise paths, using the hints and shortcuts covered in this article.

